This subject is published in Modelspoormagazine 44, with more text and pictures.
I needed some tools to etch decently, like an etching tank. These are sold at 300 Euros and more. I managed to build a very good one for less than 100. But perhaps I should first explain what etching is all about.
Etching, as it is used here, is attacking metal with chemicals. Without citing schoolbooks, just a simple example: if you put a piece of aluminum foil in vinager, it will dissolve after a while. |
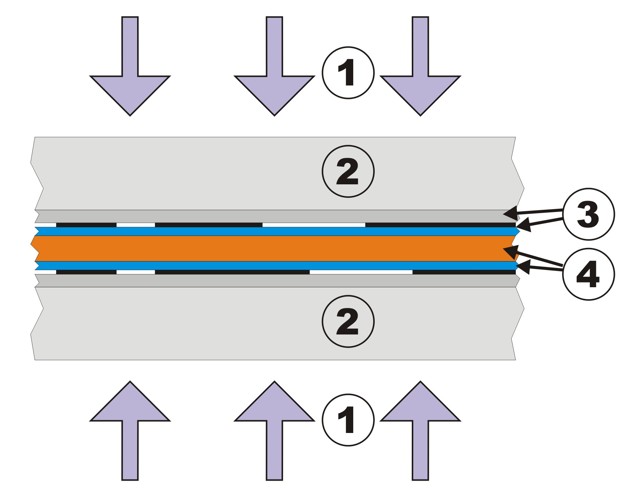 Using Ultra-violet light (1), the brass sheet (orange, 4) with its photosensitive layer (blue) is partially shielded by two printed transparant sheets (grey, 3) These materials are clamped between two layers of glass (2) |
 After illumination, the brass sheet is submerged in a developer solution (1) The photonegative layer (3) has non-illuminated parts (purple) and parts that did recieve the UV-light (blue). The developing proces erases the purple parts, so the brass sheet (2) loses some of its protection. |
|
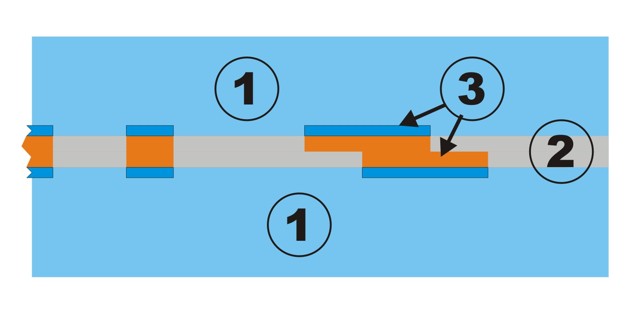 After developping the sheet is submerged in an etching fluid (1), where the protected parts (3) aren't affected, while the other parts (2) are dissolved |
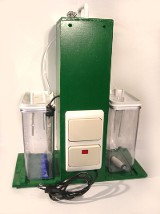
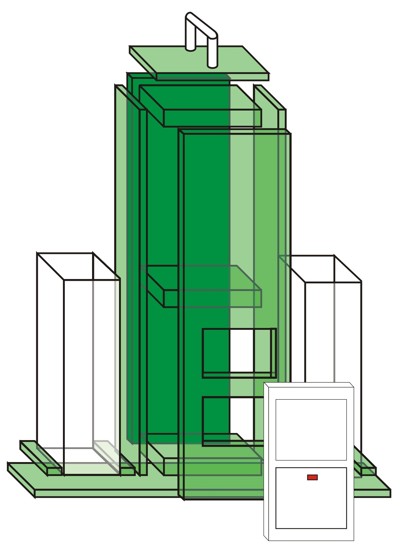
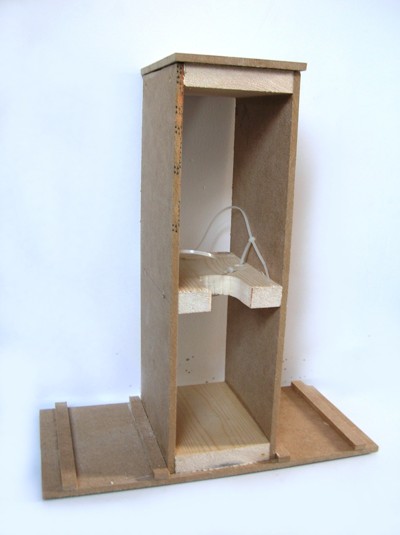
On the drawing below, you can see how the tool is constructed. De dimensions aren't very critical, except for the height: this should be at least 15cm above the fluids level, in order to protect the air pump. The device has the following characteristics:
- 2 clear, removable fluid containers with a content of 1 liter.
- etching fluids are heatable up to 50 °C
- controllable air flow
- solid, safe and portable construction.
- different sizes of sheets can be suspended
- cheap: about 100 Euro materials cost
 |
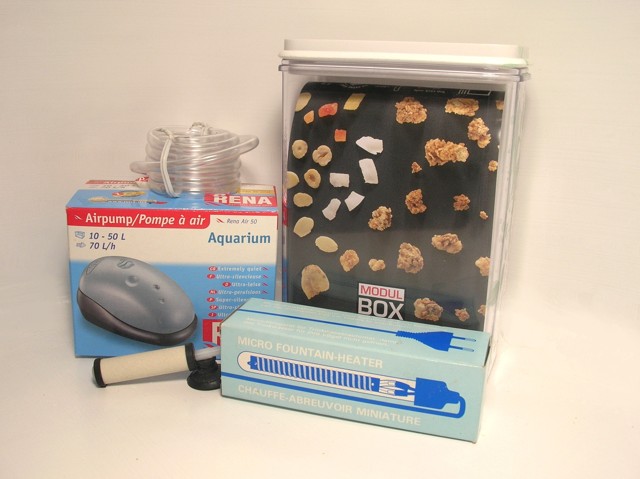 |
Material list:
 |
 |
Start by assembling the casiing. The front plate will be removable, so this is screwed only. Make holes for the switches, power cords, air hoses, ... Paint it any colour you like, except for white, as you can't spot any spilled chemicals on a white surface.
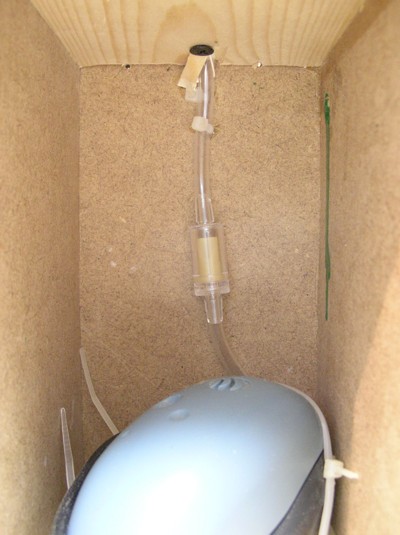
Install the air pump and the safety valve. Mount the pump on rubber, so its vibrations won't make to much noise. Make sure its air input stays free. Slide the airhoses over the connectors (don't glue them) The safety valve, combined with the high pump location, will protect the pump against reflow, which would seriously damage it.
 |
 |
 |
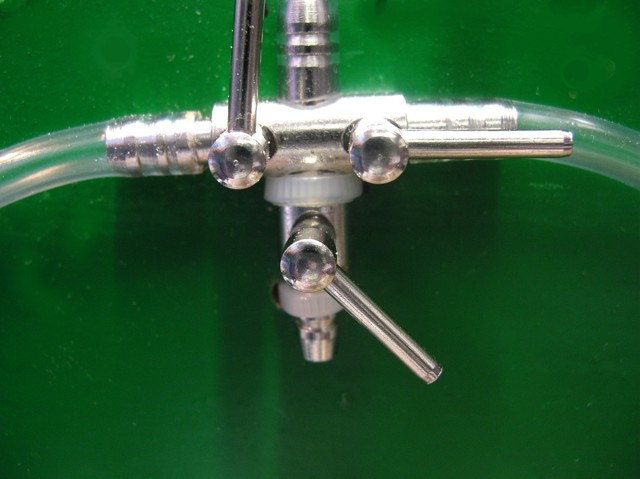
Install the three-way valve. With this handy device we can seemlesly control air flow to the containers. When not in use, block the container air supplies, so fumes can't reach the pump. Take my word for it, fumes will - in time - damage the pump.
Connect the device's electricity, using the above schematic. Seal any places where fluids can enter the case, but be sure the air pump can draw air from outside.
 |
 |
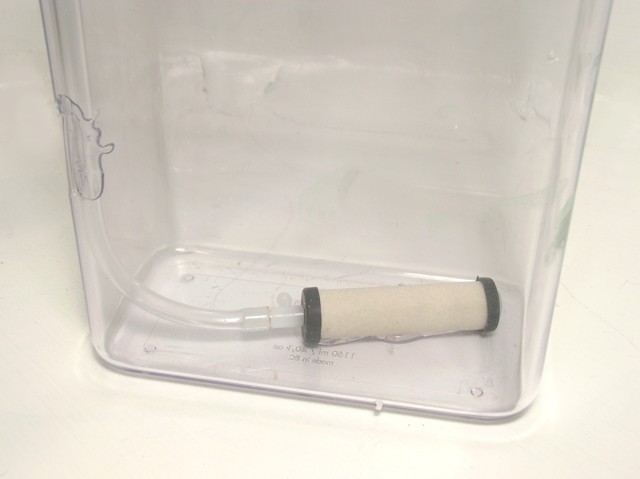
Both containers get a ceramic air stone and with a piece of air hose. Ventilation is only nescesary to mix the fluid, so its concentration and temperature remains the same everywhere. Glue the air stone to the boottom of the cantainer, and secure the airhose in a corner. Hot glue works fine for this job.
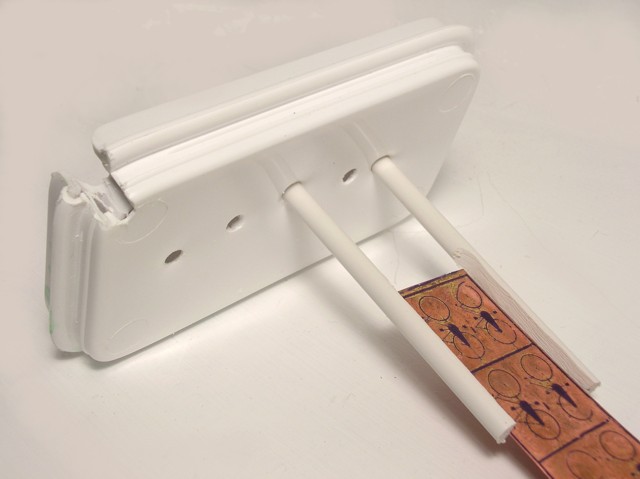
No we only have to adjust the conatiner covers. They must make room for the airhose, and we need to have a suspension system. 5mm thick styrene rods, roughly filed in shape are put through tight-fitting holes, drilled in a straight line through the box cover. As these home-made clamps should be adjsutable, drill more holes than needed, and make some small plugs from scrap pieces of 5mm styrene rod.
 |
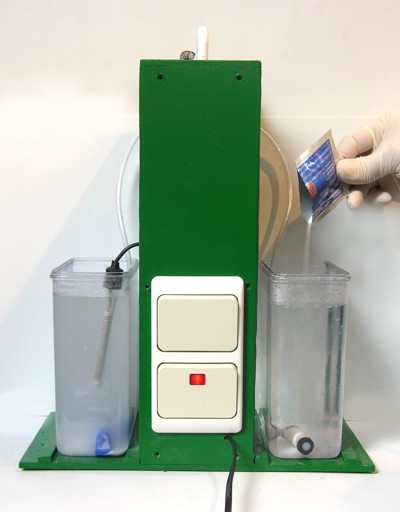 |
Let's fill the containers now. This is done using a water boiler, a liquid measuring can, demineralized water and of course the developer (NaOH) and the etch chemical: Sodium Persulfate. The products are best solved in 55°C water. We don't need a thermometer for this: freshly boiled water with room-temperature water in an even mix works fine. Fill each container with 500cc of cold water, add the same amount of boiled water afterwards.
Use disposable gloves to mix in the chemicals: 9 grams of NaOH powder in the (non-heated) developer container, 140 grams of Sodium Persulfate in the conatiner with the mounted water heater. Use the air pump to let the chemicals mix thoroughly, about 15 minutes. Be sure to close the air valves afterwards.
| ©2007 Gerolf Peeters - updated on 17.04.2007 | See: Etching - UV-light |